
Vixel guides · Storybook illustration
How to create storybook illustrations with AI
Build a character, a place and the next moment in your story. Follow our lighthouse-keeper example, then try the handmade look with an idea of your own.
By Vixel team ·
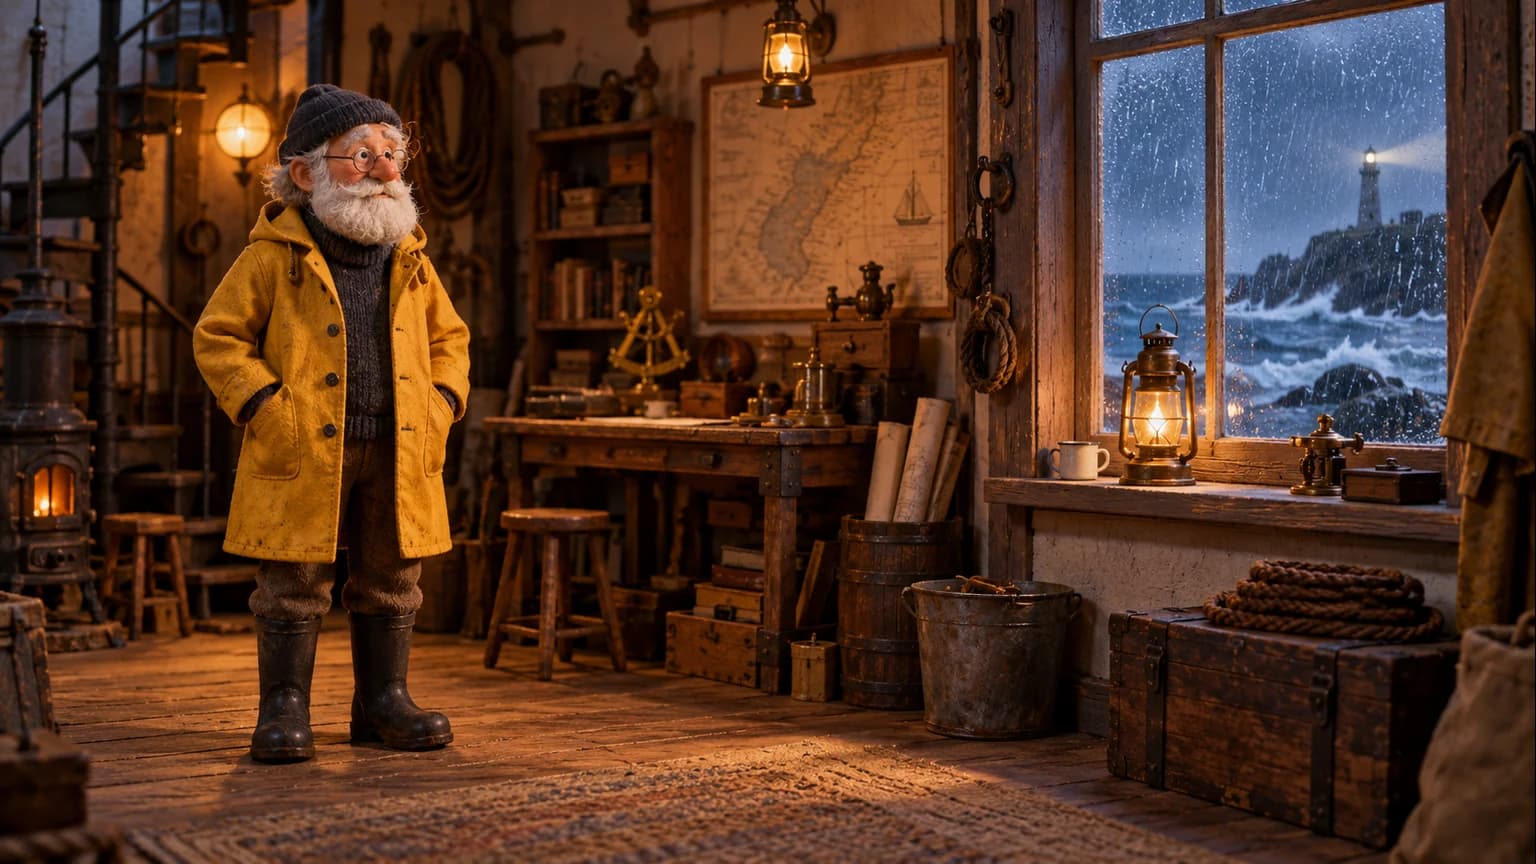
Start with one character in one place. Make an illustration you want to keep, use it to build clear character and setting references, then plan what happens next. That is the path we tried here. You can follow it for a few illustrated story scenes or use Director to develop a short film from your own idea.
I liked this lighthouse keeper before we had much of a story for him. The yellow coat was a little grubby. His boots looked heavy. Outside, the sea was rough; inside, there was a lamp, a mug and somewhere to sit.
We made these pictures in Vixel while trying reference images in different frame shapes. The world taking shape around him made me want to see another moment in that room.
Here’s how the character, the workshop and the storyboard came together—and where the pictures took liberties with the brief.
01
Choose the materials and light
The look comes from a few things you can actually point to: the knit of his hat, the worn coat, the grain in the floorboards. Amber light warms the room while blue light comes through the wet window. Even before anything happens, you know where you’d rather be.
We asked for a handmade stop-motion appearance. Naming fabric, wood and brass gave the image a more specific direction than a string of words like “beautiful” or “cinematic.” Those materials are also useful details to carry into a later picture.
Try the prompt below in Image. Change the person and place, then choose a wide or tall frame before generating. Keep the material and lighting descriptions if you want the same handmade feel.
A prompt to start with
Adapted from the test brief. Make it your own.
Create a single storybook illustration with the look of a handmade stop-motion set. An elderly lighthouse keeper with a white beard, round glasses, a navy knit cap and a worn mustard-yellow raincoat stands in his workshop. Show his whole body, including his boots. A brass lantern sits on the windowsill. Use visible knit and fabric textures, weathered wood, warm amber light inside and cool blue rain outside. Compose for the selected frame shape. No text or decorative border.
02
Give the character a clear reference
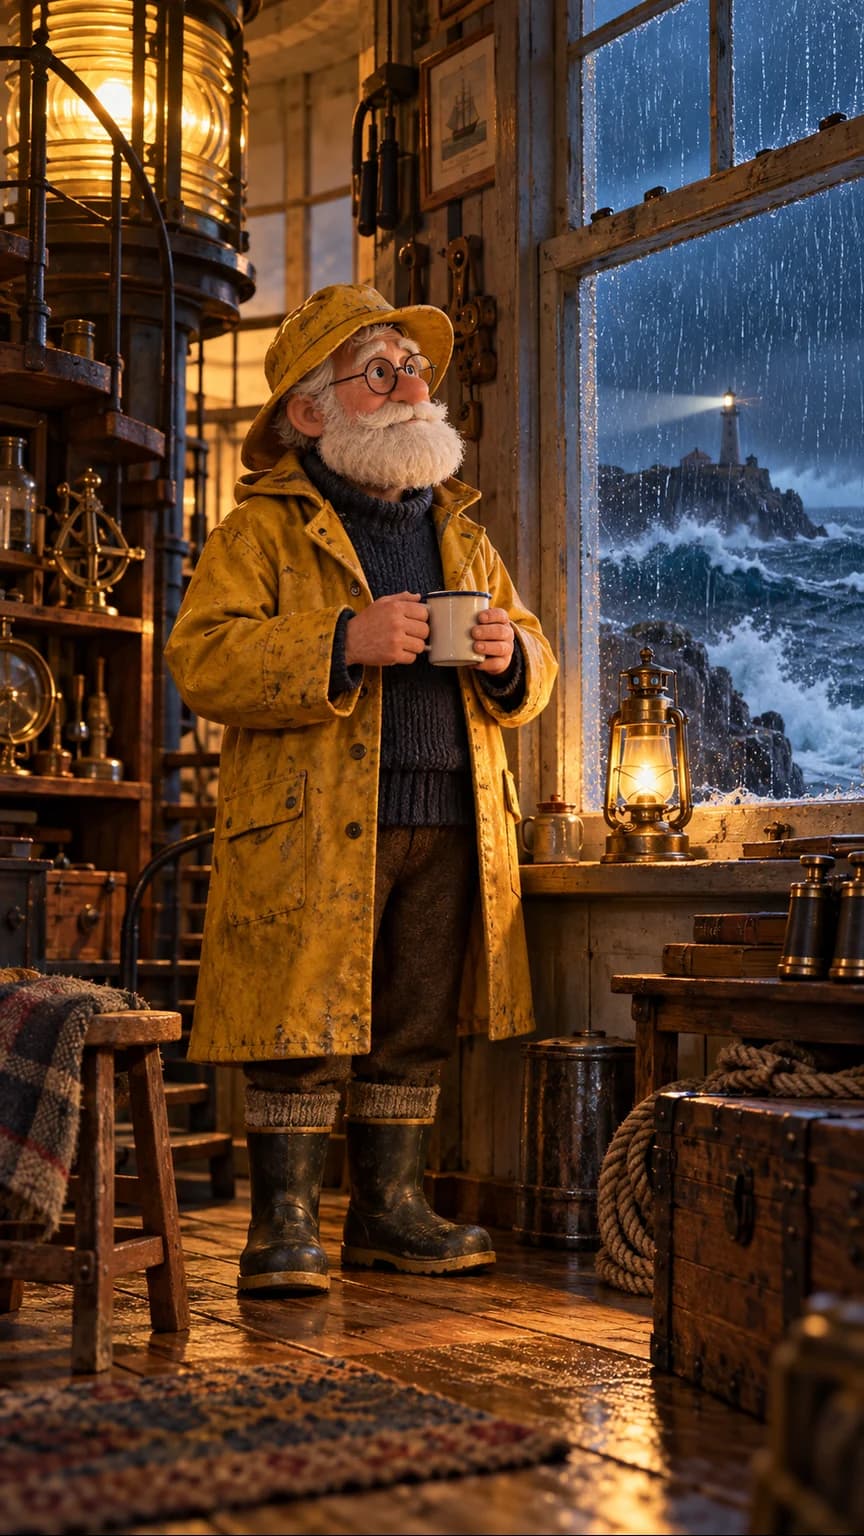
For the character sheet, we used a separately generated portrait as the reference. We asked for front, side and back views, plus a closer view of his face. The glasses, beard, coat and boots are easy to inspect against a plain background.
There was one deliberate change: the portrait had a yellow rain hat, and we asked for a navy knit cap in the sheet. That is worth deciding before you make the next scene. Otherwise, a change you happen to like in one picture can become a mismatch in the next.
For your own character, pick a reference you like before asking for other views. Name the details to keep—the face, clothing and colors—and say which changes you actually want. Look at the views together before using the sheet in a scene.
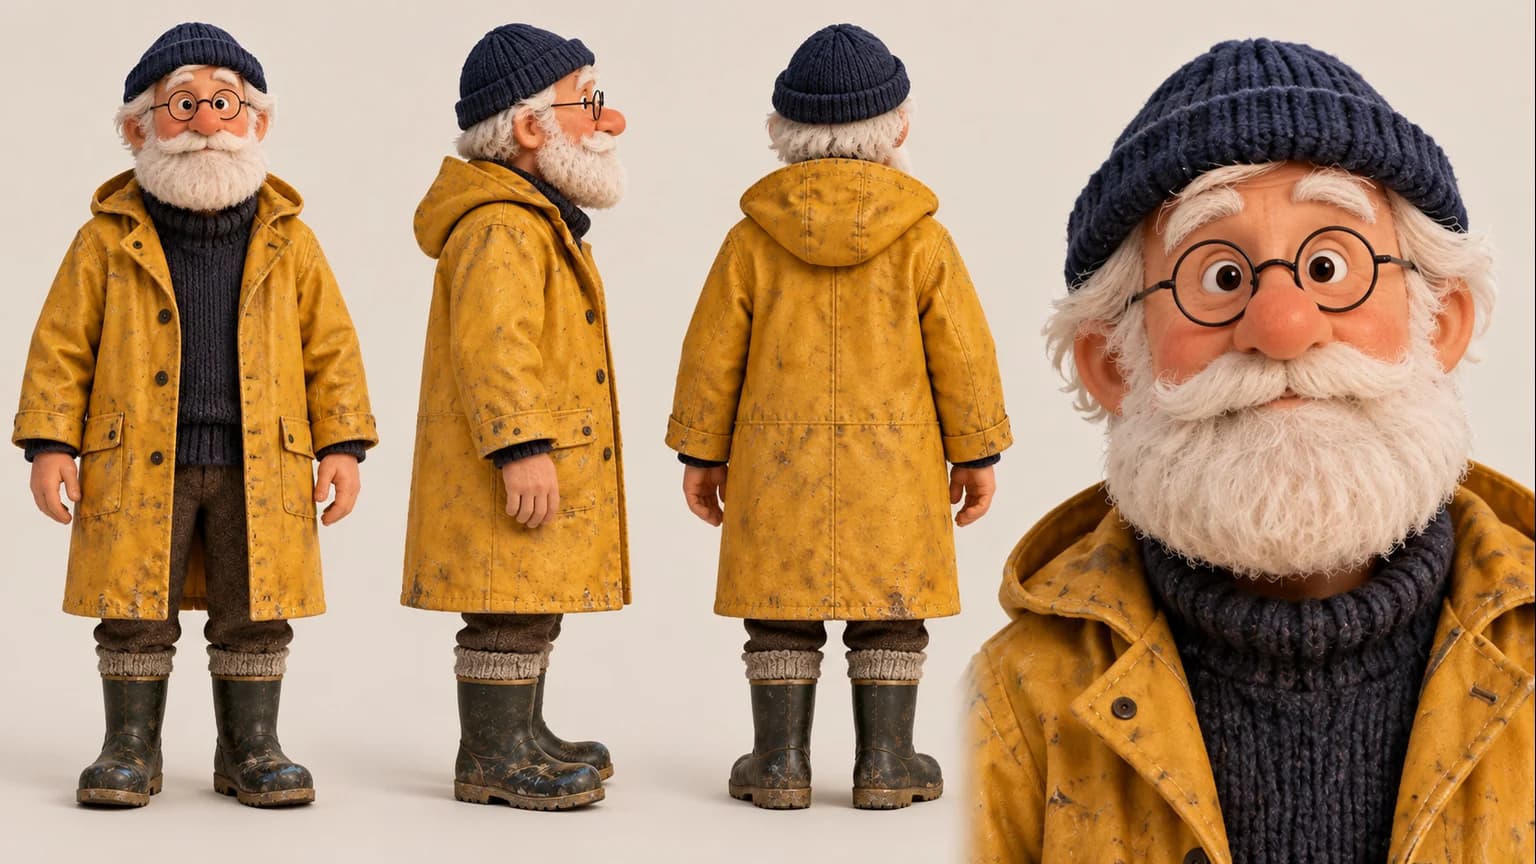
See the portrait used as the reference
03
The room needs a reference, too
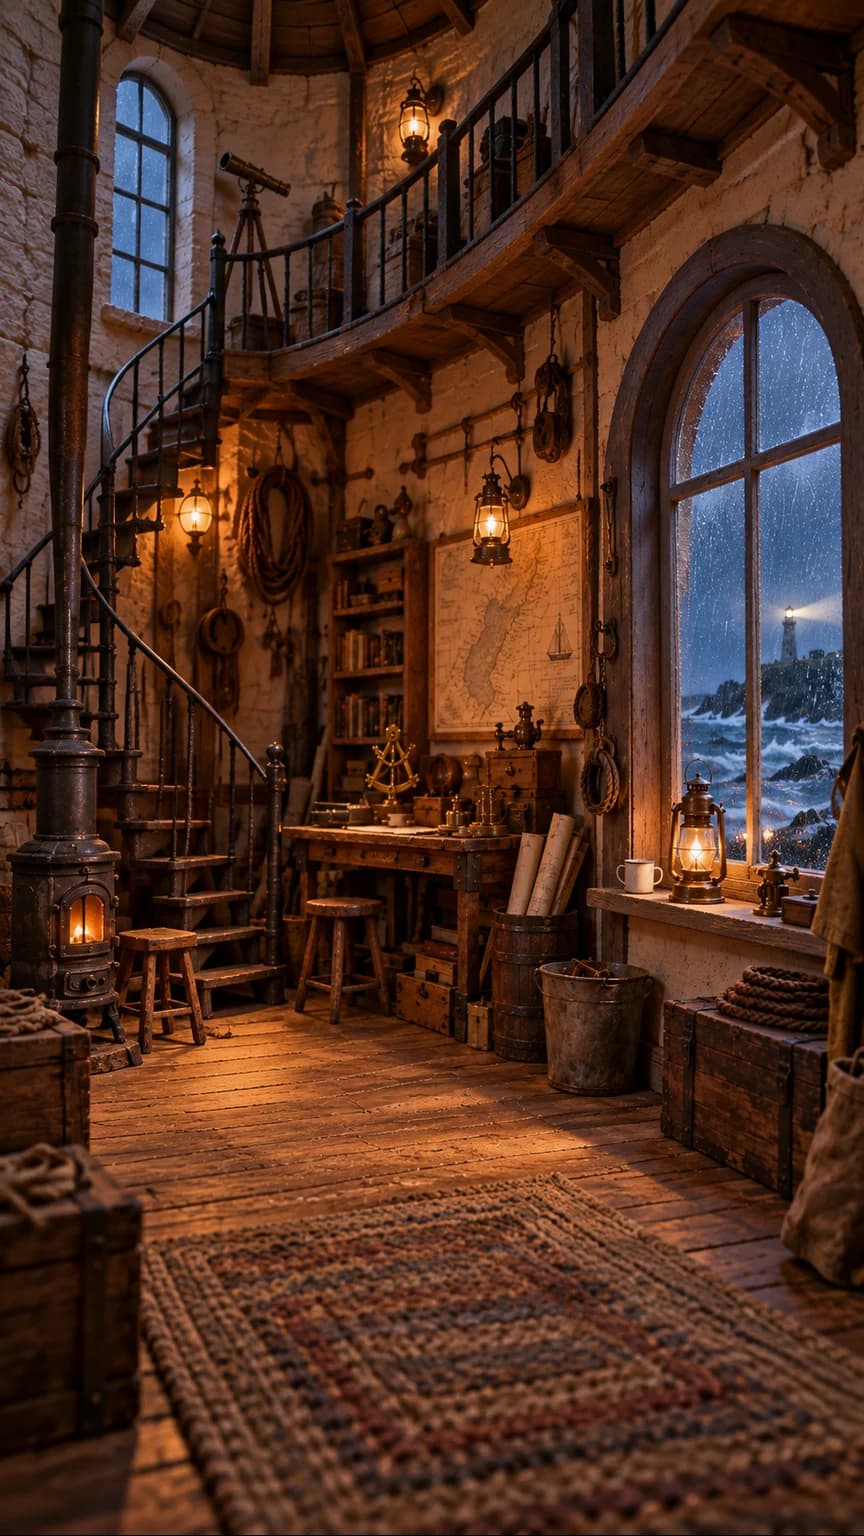
The room got its own reference, too. We used the opening landscape image to generate a tall view of the workshop without the keeper. Removing him let us see the stairs, workbench, window and light more clearly.
The two rooms share worn wood, brass lamps and a blue view of the sea. But look at the window: it is rectangular in the opening image and arched in the room reference. The atmosphere carried over; the architecture changed.
Choose which room to keep before illustrating more scenes. To make a setting reference, use your first image and ask for a view without the character. Name any window, staircase or prop that needs to stay in place, then check the result. Here, I would settle the window before going further.
04
Plan the action, then review the storyboard
For the storyboard, we supplied the tall room reference and the wide character sheet together. The brief identified which image described the place and which described the person. Their different shapes did not stop these examples from being used together.
The action we asked for was small: the keeper notices the lantern flickering, turns the wick once and smiles as the flame steadies. The sheet below gives him a much longer evening.
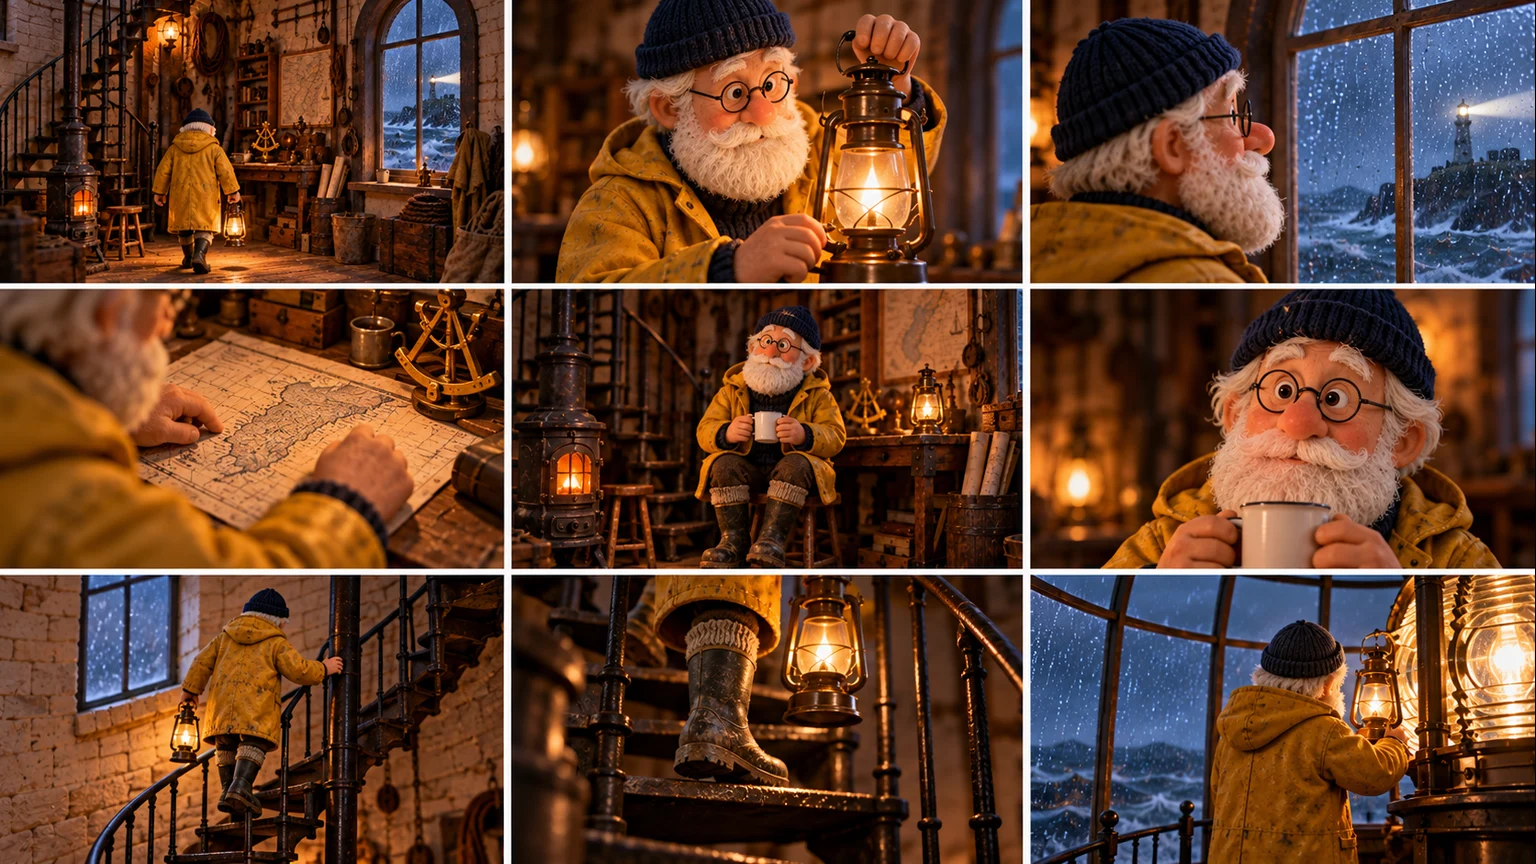
- What we asked for
- A flicker, one turn of the wick, a smile.
- What the sheet added
- Walking across the room, studying a map, drinking from a mug and climbing the stairs.
I like the tea break. It makes him feel as though he has lived here for years. But liking an extra moment is a creative decision, not proof that the original instructions were followed.
If I wanted a longer illustrated story, I might keep it. For the short lantern scene we requested, I’d narrow the action before moving to video. A storyboard is where I want to make that choice.
When you try this, give each shot one action. Attach the character and room references and say what each one is for. Compare the result with your intended sequence before making video; keep an added moment only if you want it in the story.
05
Borrow the look. Write your own scene.
For an illustration, start with someone from your own story, in one place, doing one thing. You can borrow the knit textures, worn wood and warm light without borrowing the lighthouse keeper.
For a story with several shots, open Director with Cozy Stop-Motion selected. Add your idea and review the script first. The visual direction goes with your story as you develop characters, settings and storyboards. If you made a reference in Image, you can choose it from My Assets in Director.
For me, the useful question after these pictures was simple: what would I want to see him do next? Start there. You do not need the whole adventure yet.
Style · Cozy Stop-Motion
Make a story in this style
Director opens with Cozy Stop-Motion selected. Add your own story idea, then start with a script. The style supplies the handmade look; you choose the characters and what happens.
Both open editable drafts. Generation uses credits. View plans.